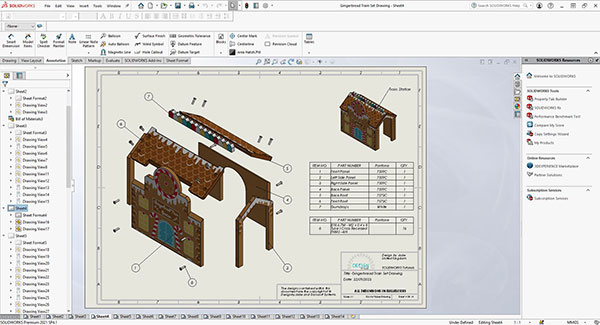
Toy designer Jade Wilson shows how to design and make panels for a gingerbread train set. Image courtesy of Jade Wilson.


Latest News
October 23, 2023
Before a toymaker sells a toy to consumers, the toy designer has to sell an idea to the toymaker, to convince the latter it’s attractive, fun and can affordably be manufactured. This is where rendering and visualization tools become the designer’s main arsenal, his or her weapons of choice. In this article, we go inside the toy designer’s digital toolbox. We also deep-dive into understanding the thinking behind the decisions involved.
The Right Perspective
Jade Wilson is a familiar name for the SOLIDWORKS community. A freelance product and toy designer, she also regularly contributes how-to guides to the SOLIDWORKS tech blog (blogs.solidworks.com/tech) and the software maker’s YouTube channel (youtube.com/@solidworks).
In a recent post, she demonstrates how to create a rolling pin with embossed design patterns so you can add intricate patterns to your dough. (Those looking for ways to impress Santa with designer cookies, take note). The post shows where you can get the pattern (for free) and how you can transfer the design onto the curved surface of the rolling pin, designed in SOLIDWORKS.
“When I create renderings of my toy designs, they serve several purposes,” Wilson explains. “One reason is to try and produce the one representative image of what a product will look like pre-manufacturing for buyers. If your rendering doesn’t sell the design, then it stays in SOLIDWORKS, so renderings can be crucial. The second reason is, for me as a designer, this is where I can test out materials, colors and shapes, to really see the design come to life. And thirdly, this is where I can animate my toy.
“A rendered animation can parade your toy design and demonstrate how it works or moves,” Wilson adds. “This can include motion, lights and exploded views of a toy.”
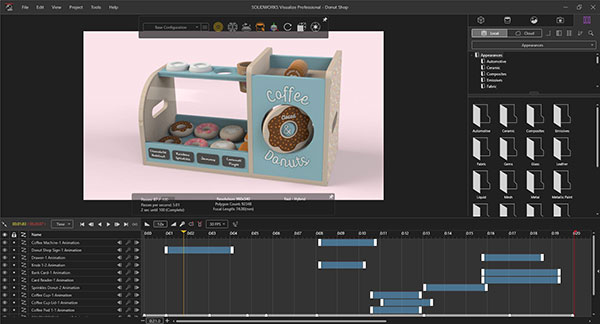
From building a gingerbread train set to a toy donut shop, Wilson guides you toward a whimsical design, ready to be produced. And SOLIDWORKS Visualize, called “the ‘camera’ for your CAD data,” is a big part of her presentation. The rendering program is included with every license of SOLIDWORKS Professional or Premium.
“Most of the appearances and textures I need for creating my designs are within SOLIDWORKS, especially within SOLIDWORKS Visualize. Their cloud libraries offer more textures and appearances that can be manipulated to suit my needs as a toy designer. Many toys these days, especially wooden toys, have very specific looks or finishes, so for materials like MDF (medium-density fiberboard), rubber wood and plywood, I have had to create in the past to produce more realistic renderings for the buyers, who want to see the product as close to the real thing as possible,” she says.
Most mainstream CAD programs offer rendering tools to turn CAD design into photorealistic images. Such programs usually include a library of standard materials (such as plastic, steel, wood, etc.) you can easily apply to your 3D design. They also give you the option to tweak and adjust the look (for example, grain density, pattern direction and glossiness) to create additional custom materials. With software with a strong user community, you may also have an option to find and download user-created materials that suit your design needs.
The Power of Decals
“When I render a toy, I have a few things in mind,” says Wilson. “My approach is to showcase the design in its best light. So, I ensure I have added any decals, textures and materials that give as much detail to the person looking at the toy for the first time. Decals in rendering add realism. These could look like product safety labels, jigsaw artwork or even price tags. You should never underestimate decals!”
Decals are two-dimensional patterns and images that can be projected into the surface of your 3D design. In most rendering packages, the ability to use decal is a standard feature. They usually offer you a way to import a raster image, like a company logo or product label, and adjust the orientation to control how it’s placed on the flat or curved surface of the design. An important thing to consider in the use of Decal is the size of the image compared to the 3D design. In some packages, you can adjust the decal after placing it on the surface. In others, you may need to adjust the decal before placing it to make it appear proportionally correct.
The Environment
Another important aspect of rendering for Wilson is the backdrop, the fictional surrounding where she chooses to put the toy model. She says, “Sometimes I like to drop the toy into an environment that complements the toy, such as a children’s room. One tip that was given to me once was that you should render with some imperfections to add realism to a design. That includes uneven woodgrains on appearances, varying the colors of wood, playing around with the camera angles, having parts of the layout be off camera, and adding a depth of field.”
Rendering programs typically come with HDRIs (high-dynamic range images) or three-dimensional environments where you can drop a model into. They may include showrooms, factory floors, garages and residential areas. The background adds ambience, and also evokes certain lifestyles and emotions to influence how the viewer may perceive the design. Wilson’s choice of a children’s room, for example, allows the toy buyer to imagine how the toy might look like in his or her child’s room.
The Toy Box as a Toy
George Olarte, art director at Spin Master, is a KeyShot user and featured speaker for the KeyShot World 2020 conference, held virtually during the pandemic shutdown. His presentation was titled “Diary of a Wimpy Package Designer,” posted to the KeyShot YouTube channel (youtube.com/@keyshot).
While designing the package for MeccaSpider, a robotic spider toy from Meccano, Olarte believes the results he got from working with a product photo in Photoshop were not impactful enough. So he decided to work directly with a CAD model instead. That was when he discovered the rendering program KeyShot, through a colleague who worked as a 3D artist.
“I begged IT to install KeyShot on my computer,” Olarte recalls.
Olarte also had the idea to turn the toy box itself into a playful jigsaw puzzle. “So the MeccaSpider is sort of in the dark, waiting. When you open it, you get a popup spider head [that] jumps out at you,” says Olarte. The Orthographic Lens in KeyShot allows Olarte to create a rendered image that could be mapped onto the surfaces of the 2D profile of the package.
“What was really cool was we were able to take the image I created, and make a mockup of that package. We were able to lay it on the top of the table so when the director opened it, the spider’s head popped out,” he says. He now uses a combination of KeyShot and Esko Studio, a 3D packaging design software.
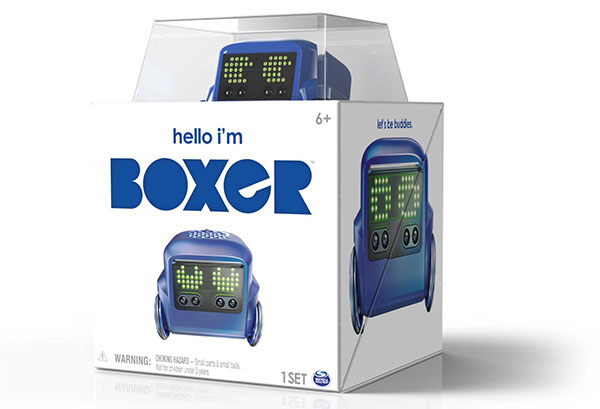
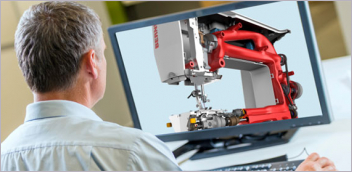
Spin Master’s interactive artificial intelligence toy boxer. The toy maker’s art director George Olarte uses KeyShot to create package designs. Image courtesy of Spin Master.
In designing the package for Boxer, an interactive AI toy with personality, he went on to learn and use the Toon material in KeyShot, which allows him to create illustration-like images revealing the toy’s inner mechanism through a transparent body. “I was able to show that not only is this product a fun robot, but it’s also technically advanced,” Olarte recalls. The way the toy pops out of the box was so impressive it became part of the toy company’s online commercial for Boxer.
In another option he created for the Boxer project, Olarte was able to use HDRI lighting against a dark background to create glowing product shots. “I’m a fan of Star Wars. I like the way light bounces off Darth Vader’s helmet,” he explains. “Playing around with lighting in KeyShot and learning how to manipulate was fun.”
More Luxion Coverage
Subscribe to our FREE magazine, FREE email newsletters or both!
Latest News
About the Author
Kenneth Wong is Digital Engineering’s resident blogger and senior editor. Email him at kennethwong@digitaleng.news or share your thoughts on this article at digitaleng.news/facebook.
Follow DE